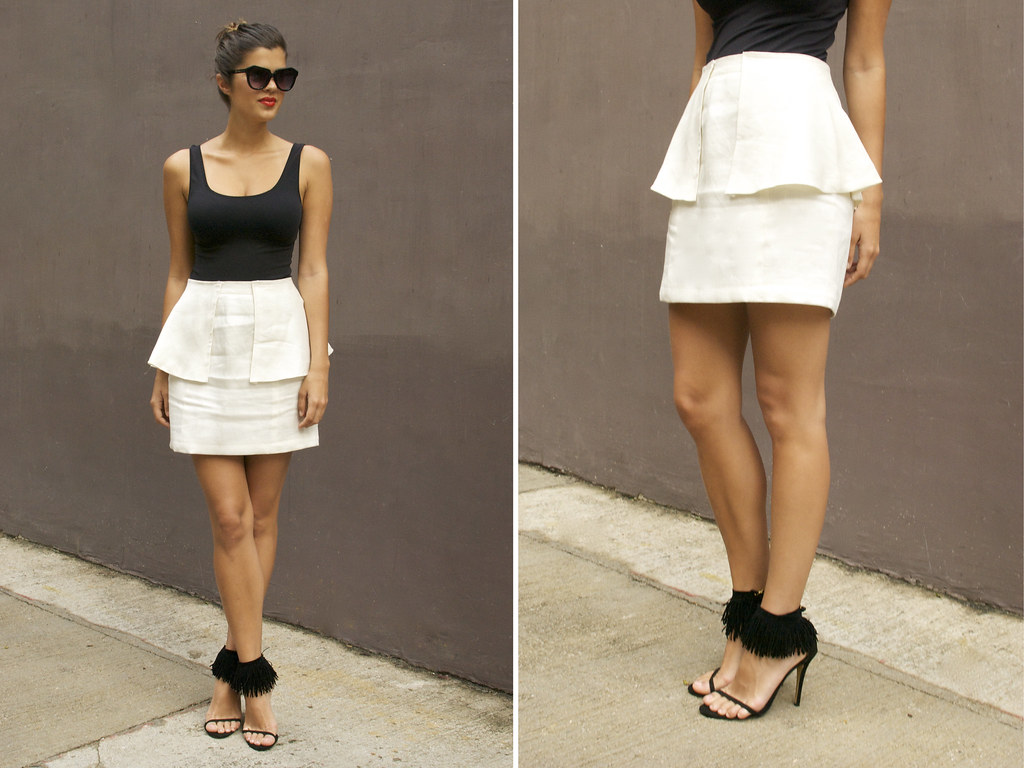
In nearly every fashion magazine I’ve read this year, I’ve come across at least one outfit sporting the peplum trend. Not familiar with it? Peplum means that the item of clothing has a piece (or pieces) of fabric, often in a ruffle, right near the waist. This trend can be seen on blouses, skirts, dresses or even jackets. Sometimes it’s a small embellishment, other times it’s a larger piece of fabric intended to create a really dramatic effect.
The great thing about this trend is that it can do a lot for different body types. If you are self-conscious about your lower stomach, choosing a peplum blouse can help completely hide that area. If you’ve got no curves whatsoever, a peplum dress or skirt will help create the illusion of an hourglass figure. No matter what your body type, you’re sure to find a piece that looks good on you.
This trend is quite girly and flirty, so if that’s not your cup of tea, peplum might not work for you. With that being said, if you have been thinking about adding some more feminine pieces to your wardrobe, you might want to try out a solid-colored peplum piece as opposed to a floral-print, lace or something ultra-feminine.
Here are some of some of my favorite peplum looks:
For those of you who know me, you know that I LOVE pizza. Since I have a love/hate relationship with gluten I've tried several different recipies over the past year that were gluten free but still allowed me to eat delicious pizza.
For dinner a few weeks ago I plaedn on making pizzas (surprised?) Instead of my usual gluten free crusts of choice I decided to try something new: cauliflower pizza. I've seen several recipes floating around on Pinterest and decided to finally give it a try.
What you'll need:
1 and 1/2 cups grated cauliflower
1 egg, beaten
1 cup mozzarella cheese
1 tsp. oregano
1 tsp. parsley
1 tsp. garlic (I used crushed garlic)
1 tsp. red pepper flakes (optional - I like it hot!)
Steps:
1. Preheat the oven to 450 degrees
2. Chop up the cauliflower into little florets and grate then with a cheese grater
3.
Rice the grated cauliflower by placing it in the microwave for 2 minute
intervals until it is softened (I cooked mine for about 4 minutes)
4. Mix the cauliflower, egg, mozzarella cheese and spices in a bowl until combined
5. On a greased cookie sheet or pizza pan press dough into a thin circle
6. Cook for 12-15 minutes and remove from oven
7.
Top with ingredients of choice. I picked pizza sauce, mushrooms and
spinach and a little cheese and some more red pepper flakes (told you I
like it hot)
8. Change oven to the broiler setting and cook
pizza for 5 more minutes or until the cheese is brown and the toppings
are cooked
9. Enjoy!
It was a healthier alternative to the pizza that I love and I am making it again tonight. I'm already dreaming about it and it's only 8 a.m.!
Are there any healthy recipes you've tried via Pinterest (or elsewhere) that you'd like to share? We are always looking for new ones!
Love the look of winged eyeliner but haven’t quite mastered it? I’ll show you two really easy tricks to help you get the hang of creating this look: the tissue method and the tape method. What?? I know it sounds weird, but using either a piece of tape or a tissue helped me master the winged eyeliner effect.
Here are the steps:
1. Before getting to the tape/tissue part, apply your eyeliner in small short strokes, making sure to thicken the line as you approach the outer corner of your eye. Trying to drag one line across your eyelid often results in unevenness and less product in some areas.
2. Stop when you get to the outer corner of your eye. Your first goal should be to apply the eyeliner as if you weren’t going to wing it out.
3. Once you’re happy with the line you’ve created, choose either the tape or tissue. If you go with the tape, I recommend placing it on the back of your hand and peeling it off first. Do this several times so that it’s not so sticky when you place it near your eye. If you have really sensitive skin or have some kind of reaction from sticking the tape on your hand, please don’t use this method! If you choose the tissue, fold it in half.
4. Align the tape or tissue with the bottom rim of your eye (you should try to match the angle), like so:
5. If you’re using a tissue, you’ll either have to hold it in place while you finish your eyeliner or tape it down. Even if you tape it down, you’ll need to apply light pressure near your eye to make sure the tissue doesn’t come up while you are applying your eyeliner.
6. In small short strokes, draw a line from the outer corner of your eye along the tape or tissue. The length is up to you; it all depends on how dramatic you want to make the look.
7. Once you have drawn that line, start at the very end of the line and slowly draw back toward the center of your eye in order to connect the wing and the rest of your eyeliner. Fill in any gaps.
You're done!
A few tips:
I think that this look works best with either liquid or gel eyeliner. These types of eyeliners are a bit difficult to wipe away once they dry, so one idea is to lightly trace out the shape of your eyeliner with the same color eye pencil or eyeshadow before putting on the liquid or gel liner.
Don’t be discouraged if you can’t get it perfect right away. Keep a cotton bud soaked in eye makeup remover handy to clean up any mistakes.
Have you tried this method? Do you use guides to apply any of your makeup?
Neon is all the rage in fashion lately. I've noticed that clothing at the gym has also adapted to this trend. I'm not sure how long it will stick around in every day fashion, but I have a feeling it's going to be a long lived trend in athletic gear. Being able to be clearly seen when you're working out (especially outside) is also safe. I feel much better on my runs when I'm wearing bright clothing that cars can clearly see.
In early June, I posted part one of my review of Kiehl’s Dark Spot Corrector. Click here to read it.
The
first positive thing I have to say about the product is that it lasted A
LOT longer than I anticipated. Even with going a bit above and beyond
the recommended usage, the product lasted until the beginning of July (I
bought it in mid-April). That’s just over two and a half months of
being able to use it twice daily! I am really impressed. When spending
$50 on one skincare item, I want it to be able to use it for a while.
After
a few weeks of using the product, I was pretty skeptical. Before I
purchased the dark spot corrector, I read a bunch of really positive
reviews – some even said the product was a miracle. Unfortunately for
me, I wasn’t seeing those instant results some reviewers saw. At the
time I posted part one of my review, I thought I could see a few signs
of improvement but I really wasn’t sure.
So, did it work?
I’m
happy to say it absolutely did! Though the spots I wanted to get rid of
are not completely gone, I’ve seen a dramatic improvement from the time
I began using the serum. My skin tone is a lot more even. What made me
realize that the serum had begun to work is the fact that I was using
less foundation and concealer to cover those areas. Now that I finished
one bottle of the serum, I don’t even need concealer in some areas.
Here are the before and after pictures:
I think the results are especially apparent in the first before and after picture!
Lastly, here’s a quick rundown of my thoughts on the product:
Easy to use? Yes.
Price? Expensive, but worth it.
Value? Excellent – lasted much longer than expected.
Does it work? Yes, but you may need more than one bottle to completely get rid of dark spots.
Would I purchase again? Absolutely.
Have you tried Kiehl’s Dark Spot Corrector? If so, did you have good results? If not, would you consider trying it?
At a recent Ulta trip I noticed this Blush & Bronze On The Go set while in the checkout line and had to scoop it up. I was in need of some new bronzer since mine had shattered in pieces just days before (RIP bronzer) and thought this would be the perfect way to sample the Tarte brand that I've heard so many amazing things about.
About The Product:
- Amazonian Clay 12-Hour Blush in Dollface (light pink) 0.11 oz.
- Mineral Bronzer in Park Ave Princess (highly pearled golden tan) 0.11 oz.
As described by Tarte:
What it is: A travel-size duo that includes bestselling essentials for a gorgeous healthy complexion. What it does: This limited-edition duo will have you looking bronzed and beautiful on the go with custom-designed travel friendly compacts that fit neatly into any pocket or purse. Formulated without oil, talc, or fragrance, Park Avenue Princess Bronzer fuses earthly minerals with naturally derived ingredients for a finish that's pure perfection. The long-wearing, light pink sheen of Amazonian clay 12-hour blush adds an additional soft and healthy glow to the skin.
What it is formulated WITHOUT:
Parabens- Sulfates- Synthetic Fragrances- Phthalates- Triclosan What else you need to know: Amazonian clay is nature's most perfect ingredient because it is completely intuitive and skin-balancing for all skin types. So whether your skin is oily, dry, or combination, Amazonian clay will respond to your specific skin concerns and neutralize for better, longer, and truer wear.
My Review:
I absolutely loved this set. And for only $15? It couldn't be beat. The bronzer is perfect for my skin tone and the blush gives a great pop to my cheek bones. I have had it for a while now and have barely made a dent in it even though I use them both every single day. They stay on all day while I am at work and well into the evening until I wash my face. I will be buying the full sized products of each when these eventually run out someday.
I would highly recommend both of these products if you would like a fresh new blush and bronzer.
Have you used any Tarte brand products before? Do you have any other recommendations for bronzer and blush?
I recently got back from a (much needed!) week-long vacation. One thing I always stress out over before traveling is what to pack. I never know how many outfits to bring or what I’m going to feel like wearing during the trip, so I try to bring extras of everything in order to give myself some options.
I used to try to bring all sorts of different eyeshadows, eyeliners and blushers in order to create any kind of makeup look I want, but I ended up packing so many products that it just got to be too much. In recent years I’ve cut down on the amount of makeup I bring on trips, but I’ve been able to figure out which products to bring so that I don’t feel limited.
Here’s what I brought with me:
• Urban Decay Naked Palette
• Garnier B.B. Cream in Light/Medium
• Benefit Erase Paste
• Laura Mercier Secret Concealer in #3
• CoverGirl Clean Pressed Powder for Sensitive Skin in Classic Ivory
• CoverGirl Clear Mascara
• CoverGirl LashBlast Mascara in Very Black
• MAC Kohl Eyeliner in Smolder
• Avon Ultra Luxury Eyeliner in Dark Brown
• MAC Gel Eyeliner in Blacktrack
• Tarte Amazonian Clay 12-Hour Blush in Dollface
• Tarte Bronzer in Park Avenue Princess
• Stila Lip Glaze in Kitten
• Tarte Lipsurgence Natural Matte Lip Stain in Lucky
• Avon Fruity Juice Lip Gloss in Tangerine
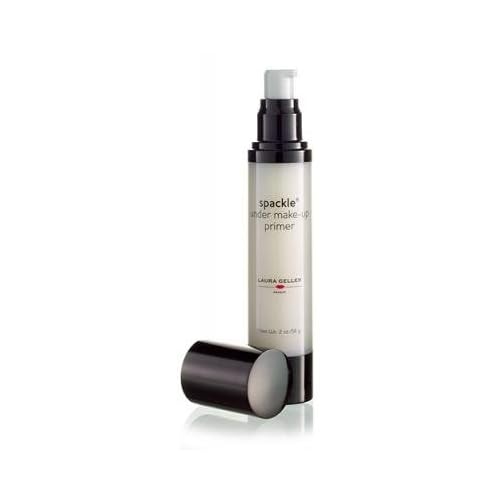
• Laura Gellar Spackle Under Makeup Primer
• Tarte Eyelash Curler
• Brushes (Foundation, Blush, Powder, 3 Eyeshadow and Eyeliner)
Here are a few tips to keep in mind when trying to decide which products to bring on a trip:
Pick one foundation/B.B. cream/tinted moisturizer that you know works for you and bring just that. There’s no sense in trying to bring several different foundations. If you’ve got one go-to product, bring that and be done with it.
Try to avoid packing single eyeshadows; this will just bulk up your makeup bag. I bring one eyeshadow palette with me – from that I can create a whole bunch of different looks.
Do you have trial sizes of anything? If so, pack them!
Think about the climate in your destination. It’s July and I traveled to the east coast, which is known for bouts of high humidity. That combined with the fact that I spent most of my time outside walking around meant that I had to bring powder (which I don’t normally wear) and a face primer. Going somewhere chilly? Skip the powder and think about bringing a creamy foundation or thicker face cream.
Lip products can change your whole look. I bring at least three different lip products -- one pink, one neutral and one wild card (something in the red/orange or purple color family). Lipsticks or glosses usually come in small packages, so it’s not hard to bring more than one.
Sometimes blushers can come in large packages, so I avoid bringing multiple products if possible. I usually bring one pink or peach blush and a bronzer. The bronzer I am currently using works with just about any makeup look, so it was a must-have for me on my trip.
If you have products that do double duty (like a stain that can be used on your cheeks and lips), bring it! These products will help maximize space in your suitcase.
I have spotted so many maxi dresses and skirts this summer that I've lost count. I LOVE this trend and up until now I haven't owned anything this length. I was always afraid that it would make me look shorter or bigger than I was - but I've discovered that it's not the case at all! I have recently purchased a few skirts and dresses of my own and can't stop wearing them. It's an easy and comfortable trend that can be worn very casual or dressed up. I love the way this looks and when done right people of all shapes and sizes can rock this trend.
Summer is in full swing – is your makeup bag stocked and
ready? Here are a few things I consider must-haves for summer:
Eye and face primers
Don’t let all the work you put into perfecting your makeup
look go to waste when you step outside. Make sure you’re wearing eye and face
primers, and be sure to pick up separate primers formulated for each area.
A few favorites:
Urban Decay Primer Potion in Original
This is my year-round go-to for eye primer. It’s
lightweight, easy-to-apply and it speaks for itself – my eye makeup always
lasts the whole day.
This eye primer comes in a close second. The product is a
little thick, but once blended it will help your eye makeup stay put. As an
added bonus, using a beige-toned eye primer helps cover any redness or
discoloration on your eyelids making the colors you apply more bright and
vibrant.
Summer is the time of year where you can wear fun and bright
makeup colors and it looks totally normal. I’m a huge fan of bright eye makeup,
especially eyeliner. My absolute favorite is wearing bright green. Come on –
you can’t really get away with that during the winter.
A few to try:
Sephora Collection Nano Liner in Chlorophyll
This bright green is adorable. And surprisingly, it works
with a lot of different eyeshadow colors.
Don’t apply a thick foundation – let your skin breathe this
summer! A BB cream or tinted moisturizer is perfect to wear “it’s hot outside”
is an understatement.
Here are a few favorites:
Garnier BB Cream in Fair/Light
This is the BB cream I am currently using, and I couldn’t be
happier. I bought this on a whim from Target and have been really satisfied
with how lightweight it feels and covers up any imperfections on my skin.
Second only to bright eyeliner, bright lip gloss is another
summer makeup must-have. I prefer it over lipstick, because it doesn’t feel or
look so heavy on the lips.
Try these:
MAC Tinted Lipglass (try Pink Poodle, Saint Germain or
Angel)
I can’t get enough of MAC lipglasses. These lightweight
glosses give a big color payoff without feeling too sticky or heavy.
Stila’s lip glazes are a little bit thicker than a normal
lip gloss, but they have so many color choices that are perfect for summer. The
lip glazes don’t wear off easily and no matter which one you choose, you can be
sure your lips will have a really pretty sheen or shimmer.
I religiously wear sunscreen, so I can’t say I’m sporting
any kind of a tan – even in the midst of summer. In order to fake it, bronzing
powder is a staple in my summer makeup routine.
Tarte Bronzer in Park Avenue Princess
This is a perfect color for lighter skin tones – it doesn’t
look too orange or ruddy. It’s best applied lightly in layers.