Follow Our Blog

Our Awesome Followers

Powered by Blogger.
Showing posts with label Nails. Show all posts

Wednesday, June 26, 2013

Sally Hansen Salon Effects Real Nail Polish Strips Review


I decided to give these nail polish strips a try once I got back from my honeymoon. My mom got these for me a while back and I'm not sure what took me so long to try them. My nails were in need of some serious TLC and I was way too lazy to paint them. Perfect solution! 


Although there were several steps to follow, I thought the application was super easy and mess free. My nail polish usually chips a day or two after I put it on (even after a professional manicure) and these lasted days longer! I think the more I practice, the better I would be at applying these. I loved that there was no drying time and I could go about my day right after I put them on. 


I can't wait to try these out again in different colors and styles. Something fun to jazz up my normal colored polish. 

Have you tried out these nail polish strips before? What did you think? 


Friday, May 31, 2013

Review: Sally Hansen Hard As Nails Hard As Wraps Powerful Acrylic Gel


Have you ever struggled with weak, flimsy or breaking nails? No matter how healthy I eat or how much calcium I have in my diet, it seems like my nails occasionally break or tear. I’ve tried various base and top coats and other strengthening nail polishes, but my nails aren't super strong.

Sally Hansen Hard As Nails Hard As Wraps Powerful Acrylic Gel is designed to protect and harden nails. The acrylic gel is supposed to provide a long-lasting seal for nails and leave a clear and shiny finish. It should be applied to clean dry nails and can be used under and/or over a colored polish. 


I’ve been wearing the gel for the past week and have observed a noticeable difference in the strength and hardness of my nails. I have been really happy with the way my nails look:


I’m still a little skeptical on this product because after I purchased it I looked at some reviews, many which said that gel chips, has a strange smell and discolors nails. I haven’t noticed a strange smell or that my nails have become discolored, but I’ve seen some minor chipping. I was wearing the product under another polish, so I’m now testing the product on its own to make sure it lives up to what I’ve seen so far. 

Sally Hansen Hard As Nails Hard As Wraps Powerful Acrylic Gel is available at Ulta for $5.99. 

What’s your favorite nail strengthener?


Tuesday, January 1, 2013

Giving Yourself The Perfect Manicure


I don’t know about you, but I can’t stand when my nails and cuticles look ragged and unkempt. Though I don’t often put polish on my fingernails, my toenails are never bare. But I don’t just slap on a coat of nail polish, there’s a lot more that I do beforehand. Here’s how to keep your nails looking great:

What you’ll need:


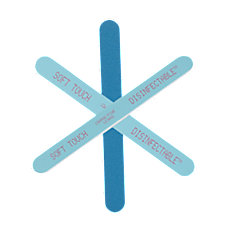
Nail file – medium grain
Washable Nail File, Medium Fine

Nail file – coarse/fine grain
A product thumbnail of Rudolph International Coarse/Fine Nail File

Stainless steel nail file (with pointed end)

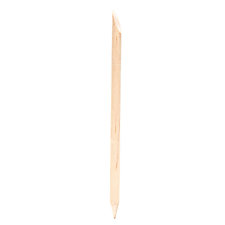
Wooden manicure stick
A product thumbnail of Ultra Birchwood Stick

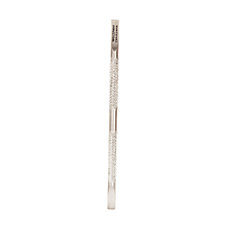
Double-sided metal cuticle pusher
A product thumbnail of "Pushy" Cuticle Pusher

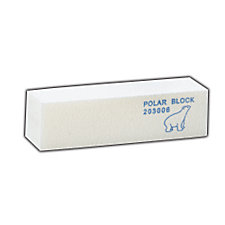
Buffing block
A product thumbnail of Four-Sided Acrylic Soft Buffer

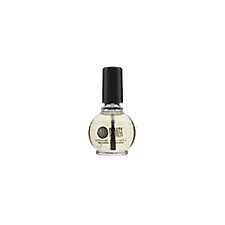
Cuticle oil or Vitamin E serum (I use Beauty Matrix Nail Fortifier)
A product thumbnail of Beauty Secrets Nail Matrix

  1. First of all, you’ll want to take care of your nails after you’ve showered or bathed. This will ensure that your cuticles are soft. Start by using your wooden manicure stick to gently push back your cuticles.
  2. Then, take your double-sided metal cuticle pusher and softly run it along the sides of your nails toward your cuticles and around the perimeter of your cuticle. This will help remove any cuticle remnants that might have grown with your nails.
  3. Using your medium grain nail file, file your nails down to your desired length. I usually file mine in a square shape with rounded corners. I never, ever use nail clipper on my nails. I just make sure to take care of my nails often so I don’t have to file them down too much.
  4. Next, take your stainless steel nail file and run the pointed edge under your nails. This will remove any debris as well as bits of nail from the filing process. You can then use your fine grain or stainless steel nail file to smooth out the edges of your nails.
  5. Use your buffing block to smooth out any ridges on your nails.
  6. Massage cuticle oil or Vitamin E serum into your cuticles and nails.

I use the same exact process for both my fingernails and toes. If I’m going to be applying a colored nail polish, I first apply a ridge filling polish (I use Bridge the Ridge Nail Treatment), a base coat (I use OPI Natural Nail Base Coat), then the nail polish. If not, I usually just put a clear polish on my nails. My favorite is Sally Hansen Hard as Nails.

Here’s to pretty nails!


Monday, October 1, 2012

Review: Impress Press-On Manicure


I am not very adventurous when it comes to manicures. I don’t go to a salon to get my nails done, and I don’t paint my nails very often because they chip after a day or two. 

I came across Impress Press-On Manicure at a drug store and bought it on an impulse. I usually don’t buy fake nails, but I was attracted to a few of the claims. Impress says that the nails are easy to apply – no messy glues. You just peel off the backing and press on to your nail. There’s no drying time, they retain shine and they last for a week.

The nails come in really cute packaging – a plastic nail polish bottle with the nails contained inside. There are 24 different nails and an alcohol pad to help prepare your nails.

To use the nails, all you have to do is select the nail that will fit each finger. To make things easier, do this before you begin applying. Thoroughly wash and dry your hands and nails. If there isn’t a nail that fits you perfectly, choose the nail that’s smaller rather than larger. Swipe the alcohol prep pad over your nails and you are ready to begin. Peel the backing off each nails and press onto your nail. I applied pressure for about 20 seconds before moving on to the next. I did my thumbs last. It didn’t take long at all – between five and 10 minutes for the entire process.


I think the nails look great. I was a little skeptical about the longevity, but I’ve had them on for nearly a week and they are holding on strong – even though showers, washing dishes and doing housework. 

If you’re in a hurry and looking for a way to get a great looking manicure or just don’t have the patience to do your own nails, I would definitely recommend picking up a set of Impress Press-On Manicure. They are not too expensive (around $8) and there are 36 different types (solids and patterns), so you’re sure to find a set you’ll like.

Have you tried Impress Press-On Manicure? What did you think? 


Thursday, September 13, 2012

Crazy Beauty Trends


Have you ever looked at someone’s hair, outfit or makeup and thought “what on earth were they thinking” only to see the next day that the craziness you saw is now a trend? Me too! I love all things beauty and fashion, but there are plenty of trends I don’t dare try because quite frankly, they’re terrible. I thought it’d be fun to share some of the beauty trends that make me cringe.

Pointy nails
Why would someone ever want their nails shaped like this? It’s impractical and it doesn’t even look good! Nails shaped like this are incredibly unnatural and I’m guessing the women who sport them have probably accidentally scratched themselves more times than they can count.

Pointy Stiletto Nails
Yikes!!!

Temporary lip tattoos
I suppose I can understand the theory behind this trend, because lipstick is the one product that needs more reapplication than any other. But aside from Halloween, why would you want your lips to look like this?

Fun Temporary lip tattoos
Hmm...

Too dark brows
If you’re going to fill in your brows, you should try to match the color that they are or go a shade or two lighter for a natural effect. I can forgive heavy dark brows seen on the runways because the intention is to be eye-catching and dramatic, but this is definitely not a trend you should copy.

//Dark Eyebrows
This poor girl.

Crazy nail art
I get it. People can do amazing art on their nails. Some of it is very cool and I can’t imagine how much skill and patience it takes to pull off, but this is --what's the word I'm looking for-- excessive, no, RIDICULOUS.

What the what....

“Caviar” lips
Playing off the “caviar” nail trend, this is one that makes me scratch my head. Sure, it’s cool in an editorial shoot, but it’s not something that’s practical or that would even look good if you’re just heading out for the night. How the heck are you supposed to eat or drink anything?

Caviar lips!
Have fun picking up the little pieces when they fall off!

Duck face
Okay, so this is not technically a beauty trend. But seriously though, are you guilty of making this face in pictures? If you're trying to look sexy, please avoid the urge to duck face. Just smile -- people find that much more attractive.

duck face
Say no to duck face, or get hit on by Donald.

What else would you add to this list?


Friday, August 31, 2012

Beauty: Fall Nail Colors

{via}
Another thing I really love about fall is dark nail polish colors. I’ve been rocking Lincoln Park After Dark by O.P.I for a few years now and it’s safe to say I have an addiction. I love how it looks black yet is a very dark purple. It may seem severe to some – but I think with some boots, a scarf, leggings and an oversized sweater it’s perfect.
{via}

Can’t commit to something that drastic yet? Here are a few more fall tones that I’m loving for this season.
{via}
{via}
{via}
{via}
{via}
{via}
What do you think of these colors? Any others you think we should try?