Follow Our Blog

Our Awesome Followers

Powered by Blogger.
Showing posts with label Recipe. Show all posts

Thursday, July 18, 2013

Baked Sweet Potato Fries


Baked sweet potato fries are my newest obsession and favorite treat. They are gluten-free friendly, paleo friendly, and well, just darn delicious. And because they are sweet potatoes AND baked instead of fried, there's no guilt involved. Just a plate full of yumminess.
 
 
Warning, they are extremely addicting so if you do decide to make these don't say I didn't give you a heads up.
 
 
What you'll need:
2 small or 1 large sweet potato washed
1-2 tablespoons of coconut oil
Sea salt and cinnamon to taste
 
 
What to do:
Preheat your oven to 450 degrees. Wash your sweet potatoes and cut them into long thin strips. The thinner they are, the crispier they get. Put them in a large bowl and add the coconut oil and gently toss the sweet potatoes until they are evenly coated. Line a large baking sheet with parchment paper and place your fries evenly on the tray. Sprinkle sea salt and cinnamon evenly over your fries. Bake for 20 minutes turning once about halfway through. Let cool (this was pure torture for me). Enjoy!
 
These were gone in a matter of minutes. I have a feeling this is going to be a regular in my weekly rotation. Yum!
 
Have you made sweet potato fries before? Let us know if you try this out!


Friday, June 28, 2013

Paleo Coconut Flour Bread Recipe


I made this paleo coconut flour bread the other day and I can't stop eating it. I put a little bit of butter or coconut oil on top after heating it up in the microwave -- so good! The original recipe called for 2 tablespoons of raw honey but I omitted it from my recipe. I didn't miss it one bit, but if you've got a bit of a sweet tooth, you can add that back in to yours.


What you'll need:
3/4 cup     coconut flour
1 tsp     baking powder
1/2 tsp sea salt
1/2 cup     coconut oil, softened
1 Tbsp     cinnamon
1 tsp     vanilla extract
2 Tbsp     raw apple cider vinegar
6 large eggs, separated

What to do:
1. Preheat oven to 350 F and grease a standard loaf pan. Line the bottom of the pan with parchment paper.
2. Mix together coconut flour, baking powder, salt and cinnamon in a large bowl.
3. Add in softened coconut oil and stir till well blended and smooth.
4. Separate the eggs, beat egg whites till stiff and set aside. Add egg yolks, vanilla and apple cider vinegar to the coconut flour mixture.
5. Quickly fold in egg whites to the mixture.
6. Pour the batter into the greased loaf pan.
7. Bake for about 40 minutes.

I hope you enjoy this recipe! Let us know in the comments if you tried it out!


Wednesday, May 15, 2013

Easy and Healthy Salmon Burger Recipe


My mom recently told me about these salmon burgers she made and I couldn't get them off of my mind. I called her last night for the recipe and I'm so glad that I did -- they were phenomenal! I knew I had to share it with all of you on the blog today. Not only are these salmon burgers delicious, they are extremely healthy and packed with protein. 


What you'll need:
1 can wild Alaskan pink salmon (I purchased mine at Trader Joe's)
1 tablespoon coconut flour 
2 eggs
1 tablespoon coconut oil

What to do:
1. Open your can of salmon and drain all of the liquid out.
2. Using a fork, flake the salmon into small pieces making sure there are not any bones and put the contents in a medium sized bowl. 
3. Add the eggs and coconut flour and stir until contents are fully mixed 
4. Heat your tablespoon of coconut oil in a medium sized frying pan until it's fully melted. 
5. Form medium sized patties with your hands and place them in the heated pan. Make sure to lightly press down on them with a spatula so they brown evenly.
5. After 4-5 minutes, flip your burgers and cook for an additional 4-5 minutes, until golden brown. 
6. Enjoy! 

We enjoyed ours with some grilled zucchini - it was fantastic! 


Have you made salmon burgers before? What is your favorite thing to make in the summer?

Wednesday, May 1, 2013

Black Bean Burger Recipe


I have seen so many black bean burger recipes on Pinterest and have wanted to try creating my own for a long time. We finally put the grill out yesterday so it was the perfect time to try it out! I really made up my own thing based on some different recipes and surprisingly they turned out amazing! I hope you enjoy them :)


Black Bean Burger Recipe (makes 3 large burgers) 
 
What you'll need:
1 can black beans drained and rinsed 
1/4 cup breadcrumbs (cooked quinoa or dry oats would work great too)
1/4 tablespoon olive oil 
seasonings - I just eyeballed it instead of measured and added black pepper, Italian seasonings, hot sauce, cumin and red pepper (can you tell I like spices?)

What to do:
1. Preheat the oven to 300 degrees.
2. Using a food processor or blender, pulse half of the can of black beans a few times.
3. Add your olive oil and seasonings and give it a few more spins.
4. In a medium sized mixing bowl gently fold your blended bean mixture with the rest of the can of beans and the breadcrumbs. 
5. When mixed together wet your hands and form three medium sized burger patties. 
6. On a lined baking sheet, bake your burgers for 30 minutes at 300 degrees. 
7. Throw them on the grill for a few minutes to warm and brown them.
8. Enjoy! 

I put a little cheese and A1 on mine -- my favorite way to enjoy a burger! I'm so glad I found an alternative to red meat that I love! We enjoyed ours with some grilled summer squash and brussels sprouts.

Have you ever tired black bean burgers before? Let us know if you try this recipe out in the comments!

Thursday, April 25, 2013

Easy Mexican Tostada Recipe


After working 8 hours and commuting a little over 2 hours each day, the last thing I have energy for at the end of the day is cooking an elaborate meal. We try to eat at home Monday-Thursday and I like to incorporate easy and healthy meals into our rotation. These Mexican tostadas are super easy to make and can be customized to your liking. We hope you enjoy them!


What you'll need:
6 corn tortillas
1 can refried beans (I used refried black beans with jalapenos from Trader Joe's)
2-3 tablespoons olive oil
3/4 cup cheddar cheese
Optional toppings: sour cream, green onions, cilantro, lettuce, avocado, tomatoes, hot sauce, etc.

What to do: 
1. Preheat the oven to 400 degrees 
2. Using a basting brush and olive oil, lightly coat both sides of your tortillas 
3. Place your coated tortillas on a baking sheet lined with aluminum foil and bake for 10 minutes 
4. Use your can of refried beans to evenly coat your six tortillas 
5. Sprinkle your cheese evenly over the tortillas and bake for an additional 5 minutes 
6. Let cool slightly and top with your favorite toppings. We used fresh tomatoes, sour cream and hot sauce last night. I love adding green onions and cilantro too! 

See - told you it was easy! This meal takes less than 20 minutes to make and cleanup is easy too. My kind of weeknight meal :)

Do you have any easy dinner recipes you love? Share them in the comments! 


Tuesday, April 9, 2013

Easy Healthy Stuffed Chicken Recipe


If you're like me, you don't have much time at the end of the day to cook a delicious meal that's also nutritious. It's so easy to eat terrible when you're on a time crunch, but I've got a very simple and quick stuffed chicken recipe for you to try!
What you'll need:
3 boneless, skinless chicken breasts (I used organic, grain fed chicken breasts)
5 medium baby portabella mushrooms, sliced 
1 handful of baby spinach
1-2 tablespoons olive oil 
1 teaspoon Italian seasoning
1 teaspoon cayenne pepper (optional if you want a little kick)
salt and pepper to taste 

What to do: 
1. Preheat the oven to 375 degrees.
2. Line your dish with foil. I used the parchment paper foil combo sheets and they worked perfectly.
3. Slice your chicken breasts almost in half longways, stopping just before you get all the way through.
4. Take a few slices of baby portabella mushrooms and a small handful of spinach and stuff each chicken breast until you've used all of your ingredients.
5. Drizzle your chicken with your olive oil and sprinkle your seasonings on top. 
6. Bake for approximately 35 minutes or until chicken is fully cooked.
7. Enjoy! 


I served ours with some roasted brussle sprouts and asparagus. Jay went back for seconds! This dish would be great with some goat cheese stuffed inside as well. Next time! 

Do you think you'll try this the next time you're looking for a quick and easy healthy dinner option? Let us know if you do in the comments! 


Saturday, March 16, 2013

Simple Springtime Salad Recipe


I can't get into salads when it's cold out. Something about the winter makes me crave all warm comfort foods and salads and smoothies don't sound as appealing to me. Now that spring is right around the corner, I've been craving salads like crazy. I made this one the other day for a dinner party and it was a huge hit. Jay and I liked it so much that we made it again as part of our dinner last week. 


It's so simple and easy to put together, yet is full of flavor and will make you want to go back for seconds (or thirds). 

What you need:
1/2 cup chopped walnuts 
3/4 cup crumbled goat cheese 
1 large green apple 
1 bag baby spinach 
dressing of choice (we used pear and gorgonzola dressing and it was fantastic on this salad!)

What to do:

  1. Preheat your oven to 350 degrees and spread walnuts on a pan with parchment paper (easy cleanup!)
  2. Bake for 5-7 minutes until they are lightly toasted. Make sure to not let them burn! 
  3. I bought a log of goat cheese at the store so I sliced mine up in small little crumbles 
  4. Chop up your green apple into small cubes 
  5. Start with a generous layer of baby spinach and top it with a handful of apple cubes, goat cheese and walnuts. Start layer over again until you've used all of your ingredients. I find that this layering technique insures you'll get an equal amount of each topping in your bowl.
  6. Dish up and top with some dressing
  7. Enjoy! 

Can you enjoy salads in the winter or do you prefer to eat them when it's warmer out? What's a salad recipe that you love?


Tuesday, March 5, 2013

Nutrition: How to Pump up Your Oatmeal


I'm a huge believer that breakfast is the most important meal of the day. If I don't eat a huge protein packed meal in the morning I'm hungry within the hour. It keeps me moving and ready to tackle whatever challenges I have to face that day. 

I've recently been adding a ton of protein and healthy fats to my oatmeal and it's made a huge difference. I'm full for way longer and feel more energized and complete. There are so many flavor combinations you can try to keep it interesting. I have been sticking to my normal mixture lately, but it's fun to mix it up every once in a while. 


What you'll need:
1/2 cup oats (I used the gluten-free kind from Trader Joe's)
1/2 cup water 
1/2 cup milk of your choice (I used almond milk)
1 heaping tablespoon of peanut butter or any nut butter of your choice
1 teaspoon flax seeds 
1 teaspoon chia seeds 
1 scoop protein powder (I used vanilla egg white protein)
Any other mix ins you'd like such as bananas, nuts, berries, raisins, etc. 


What to do:
Combine the 1/2 cup oats, 1/2 cup water and 1/2 cup milk in a microwave safe bowl and microwave on high for 2-2 1/2 minutes 
Stir mixture to combine and let sit for a minute 
Add your peanut butter, flax seeds, chia seeds, protein powder and any other fruits or nuts and stir to combine 
Enjoy!


This breakfast has been such a staple for me over these chilly winter months. I look forward to it every morning and love how great I feel after! 

Do you have any breakfast meals you love to eat that keep you full throughout the morning? Share in the comments below!


Wednesday, February 27, 2013

Nutrition: Natural Healthier Homemade PB Cups Recipe


If I could pick one thing that I could eat forever and never get sick of it would be peanut butter. Seriously I'm obsessed. I put it in my oatmeal every morning and even eat spoonfuls of it as a snack. I buy the natural kind at Trader Joe's so I don't feel THAT bad about my obsession -- it's a good source of healthy fats and protein.

I recently experimented making my own homemade healthier version of a PB cup and I nailed it. I can't eat added sugars so I omitted it from the ones that I made but it can easily be incorporated into this recipe to make it a little sweeter. If you love peanut butter you're going to love this treat. It's full of good fats and oils and is 100% natural. Can't beat that.


What you'll need (makes 1 large personal PB cup):


1-2 tablespoons peanut butter (or any nut butter of your choice) Since I love peanut butter so much I like my radio to be more PB and less coconut oil/coco powder but if you like them equally the same you can change the measurement ratios.
1 tablespoon coconut oil
1/2-1 tablespoon unsweetened cocoa powder 
1 teaspoon sweetener of choice (I omitted this step) 
1 cupcake liner 

What to do:
1. Take your cupcake liner and put your peanut butter layer on the bottom. 


2. Melt the coconut oil in the microwave for 15-30 seconds until it liquifies 
3. Stir in the cocoa powder (and sweetener if you choose) and it will form a liquid chocolate sauce 
4. Poor on top of your PB base 


5. Freeze for a minimum of 2 hours 


6. Enjoy! 


Note: These will melt if kept outside of the freezer so if you make more than one or don't eat the entire thing remember to store the extras back in the freezer.

These couldn't be easier to make and only require a few simple ingredients. I have been eating these for the past few nights and it's safe to say I've found a new guilty pleasure. 

What do you think of this recipe? Do you have other natural healthy desserts you'd like to share?


Monday, February 18, 2013

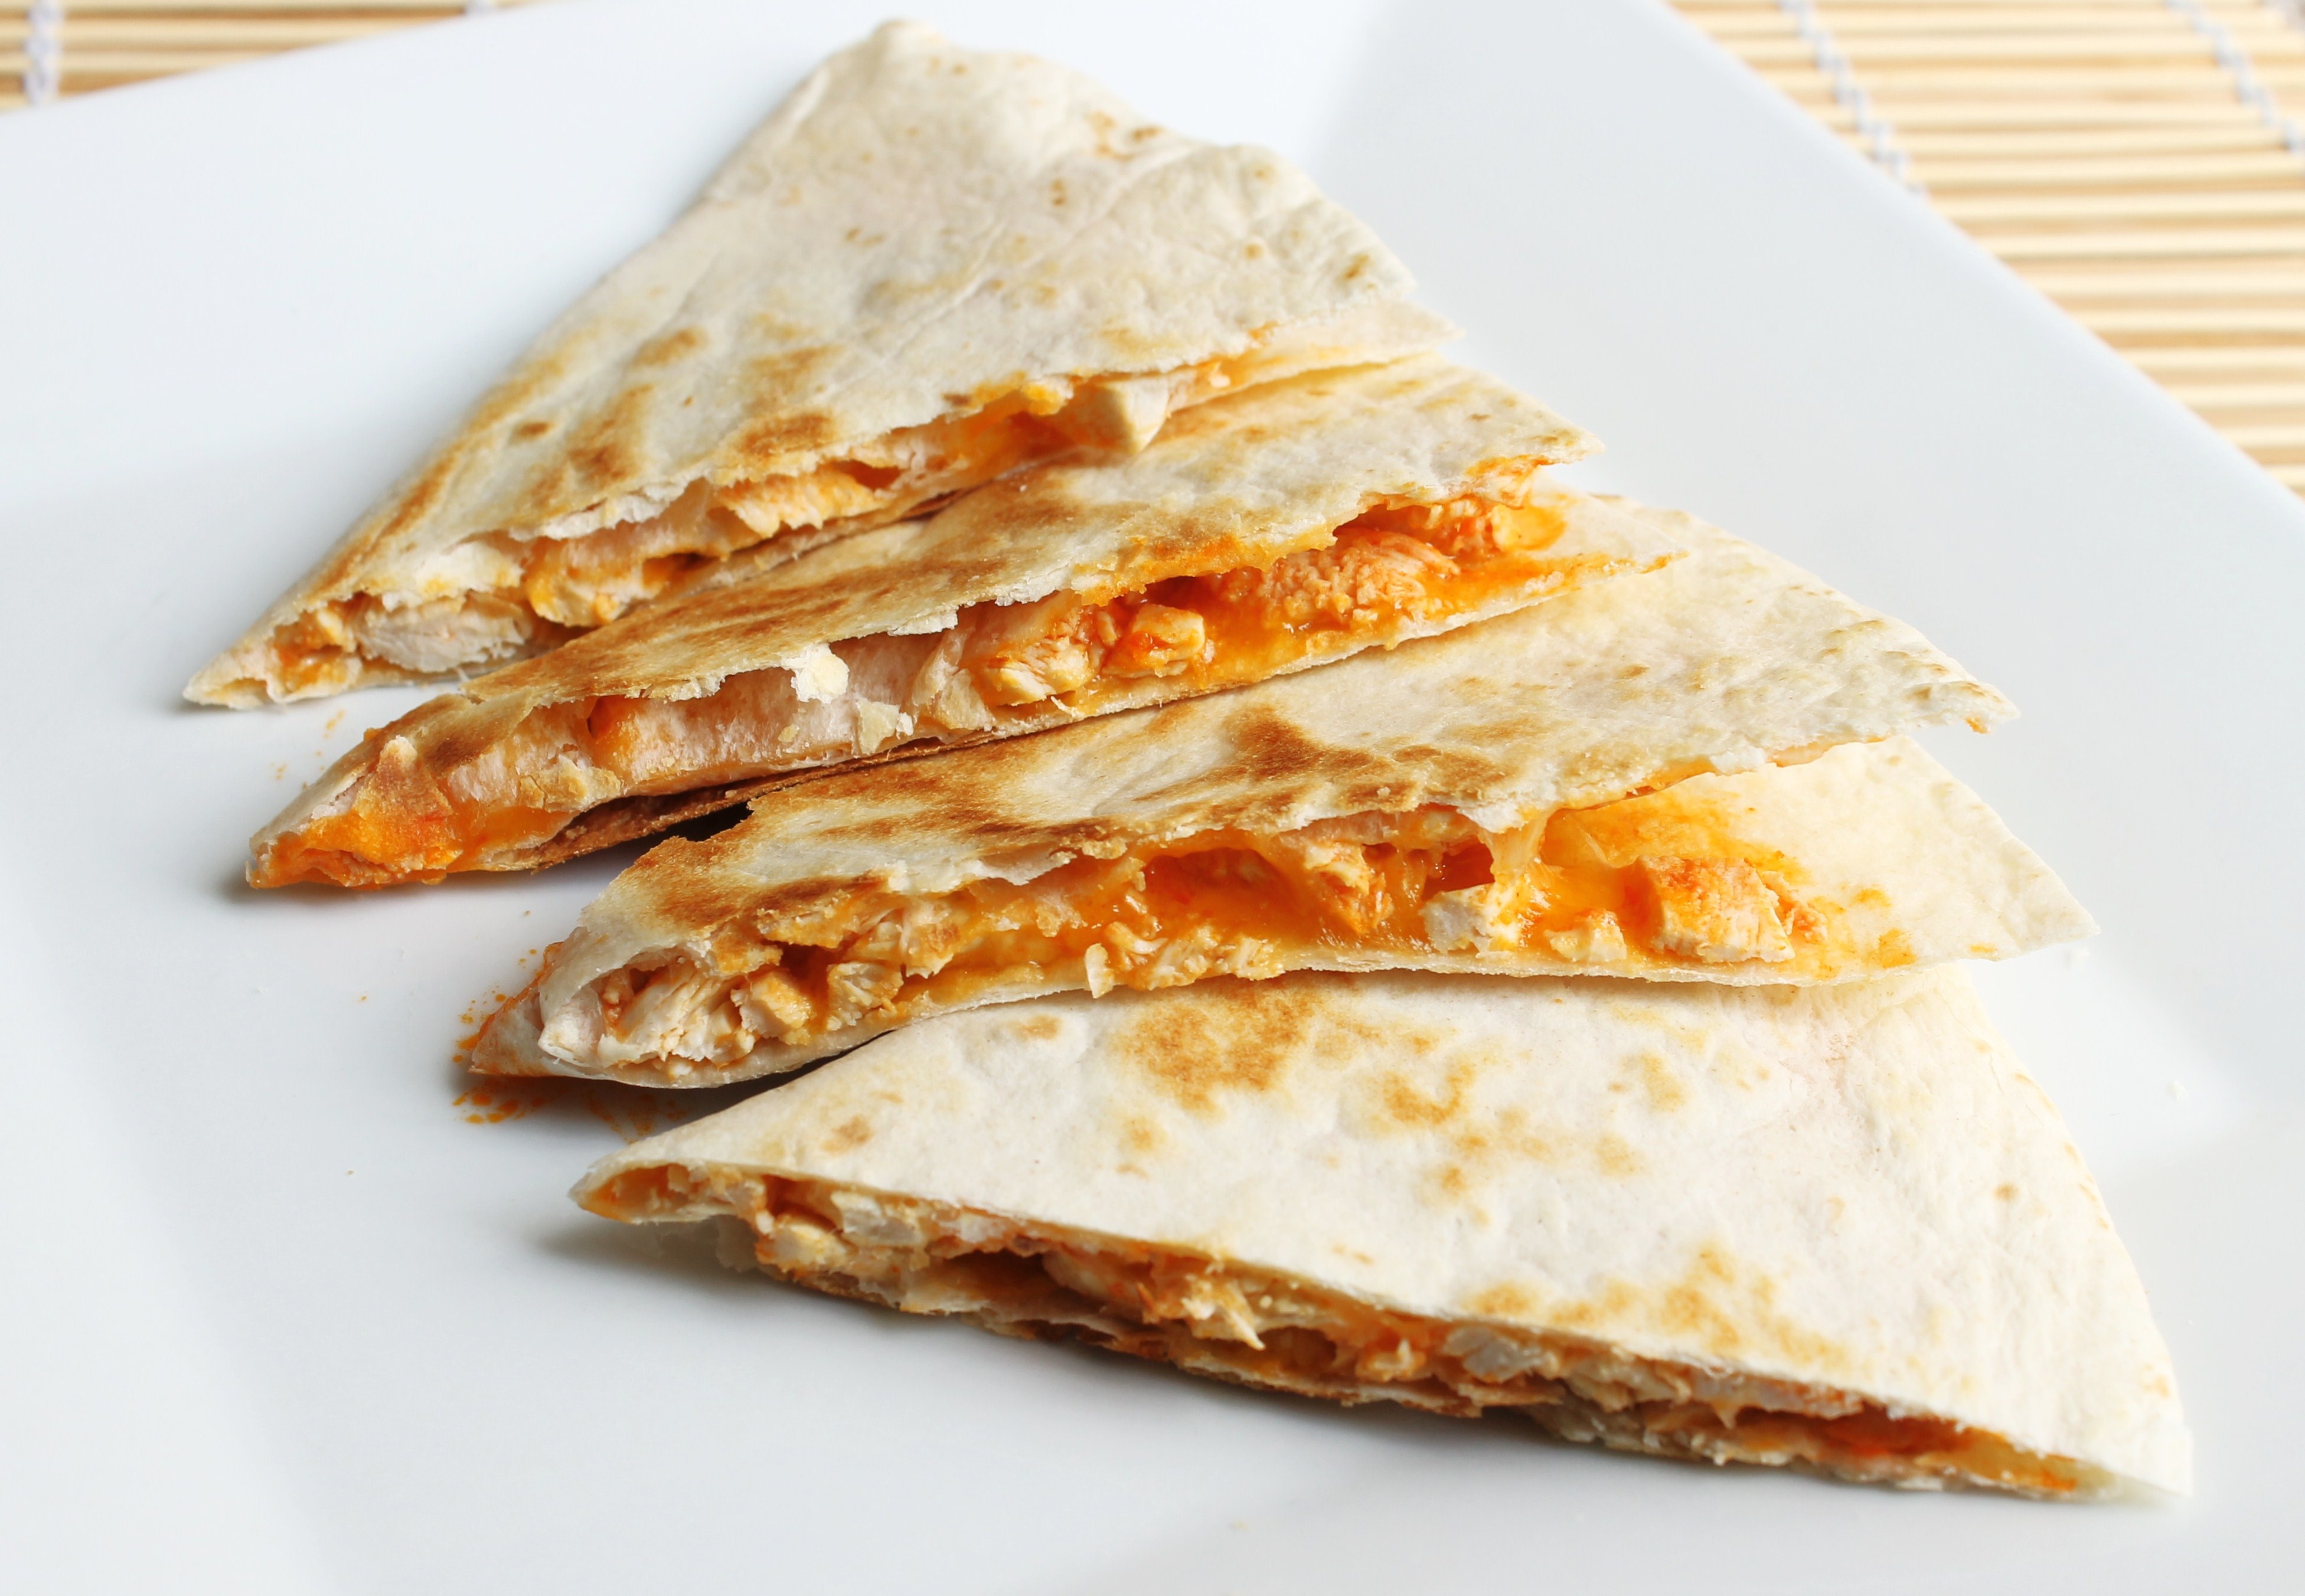
Recipe: Quick and Easy Chicken Quesadillas


What you need:

  • 1 cup of cooked shredded chicken
  • ¾ cup of grated cheese (cheddar or a Mexican blend is best)
  • ¼ cup fresh tomato salsa or chopped tomatoes
  • 4 whole wheat tortillas
  • Cooking spray

How to do it:

  1. In a bowl, combine the chicken, cheese and salsa/tomatoes. 
  2. Place two of the tortillas down on a flat surface.
  3. Scoop the chicken/cheese/salsa mixture onto the two tortillas, dividing evenly. Spread the mixture, but leave some room near the edges.
  4. Place the two remaining tortillas on top.
  5. Spray a large frying pan with cooking spray and place one of the quesadillas down. Cook over medium heat for two to three minutes. Flip and cook for an additional two minutes.
  6. Remove from the pan and slice into wedges.

A few tips to keep this recipe healthy:

  • If you absolutely must garnish with sour cream, use the fat free kind.
  • Use this meal as a way to get your veggies—add onions or peppers as part of the filling.
  • Top the quesadillas with sliced avocados or guacamole.
  • If you need a side to go with your meal, try black beans.

Enjoy!


Friday, February 15, 2013

The Best Yellow Cake Cupcakes with Chocolate Buttercream Frosting Recipe


Can you believe it? Valentine's Day is officially over already! I hope you all had a great day that was filled with tons of love -- no matter what you ended up doing. I'm going to share the BEST yellow cake cupcakes with chocolate buttercream frosting recipe with you today. I know it's a day late if you were looking for something sweet to bake for the holiday, but these are great ANY day of the year. Warning: cleanup can be tricky since you're going to the extra mile and not using a boxed cake mix or jar of frosting but the extra effort is definitely worth it. You can see from the photos that I need to work on my frosting skills, but as long as they taste delicious I think we can let that slide ;)

What you need for the chocolate buttercream frosting:
1 cup unsalted butter (2 sticks or 1/2 pound), softened
3 1/2 cups confectioners (powdered) sugar
1/2 cup cocoa powder
1/2 teaspoon table salt
2 teaspoons vanilla extract
4 tablespoons heavy cream

What to do:
1. Cream butter for a few minutes with a hand mixer.
2. Stir 3 cups powdered sugar and cocoa mixture into the mixing bowl.
3. Turn mixer onto the lowest speed until the sugar and cocoa are mixed with the butter.
4. Increase mixer speed to medium and add vanilla, salt and cream and beat for 3 minutes.
5. If frosting is a little runny, add a little more sugar and mix again/If your frosting is a little too thick, add additional cream 1 tablespoon at a time. (I had to add two additional tablespoons of cream before my mixture was perfect)


What you need for the yellow cupcakes:
2 cups all-purpose flour
1 + 1/4 cup sugar
1 tablespoon baking powder
1 teaspoon salt
1/2 cup butter (1 stick), softened
1 cup milk (I used skim)
1 teaspoon vanilla extract
2 eggs
24 cupcake liners

What to do:
1. Preheat oven to 350 degrees. Place your cupcake liners in your cupcake baking pans.
2. In a large mixing bowl stir together flour, sugar, baking powder and salt.
3. Add butter, milk and vanilla. Beat with a hand mixer on medium speed for 3-4 minutes, occasionally scraping sides of bowl. Add eggs, beat for 3 more minutes.
4. Pour batter into cupcake liners, filling each 3/4 of the way full. Bake approximately 25 minutes or until knife comes out clean.
5. Let completely cool before icing -- VERY IMPORTANT unless you want runny butter cream :)

 
Let us know if you make these cupcakes! Any other sweet treat recipes you'd like to share?


Monday, February 11, 2013

Stuffed Butternut Squash


I found this recipe floating around Pinterest and new I had to give it a try. Butternut squash are always great but there is something about eating them in the fall and winter. They are so hearty and so good for you, it's hard not to love them! 

I modified the recipe a little to create the most delicious filling vegetarian dish I've had in a while. It was full of flavor and was really easy to make. I know all you meat eaters would love this dish too -- I honestly didn't miss the meat at all!


What you'll need
1 large butternut squash
1 tablespoon olive oil
1/4 cup sun dried tomatoes
3/4 cup mushrooms,  I used baby portabellas
2 cloves garlic, diced
1/2 cup cooked quinoa
1/2 cup mozzarella cheese, plus more for topping
salt & pepper to taste

What to do:
  1. Preheat oven to 400°.  Slice squash in half longways and scoop out the seeds. Place each half cut side down in a 9x13 pan and pour 1/2 inch of water in the bottom. Place pan in the oven and bake until tender, about 45-60 minutes. Once done, remove from oven and set aside.
  2. While the squash is cooking, cook your quinoa. I love to make mine in a rice cooker becuase I can just throw it in with some water and I don't have to worry about watching it. Stove top works just as well though!
  3. While squash and quinoa are cooking, heat olive oil and add the garlic and mushrooms in a large skillet. After about 6 minutes add your sun dried tomatoes. Saute mixture until tender but make sure to not overcook it.
  4. Once squash is done scoop out the insides, leaving 1/4 - 1/2 inch on the sides and bottom. Drain water from the pan and return the squash to the pan cut side up.
  5. Mash the scooped out squash and stir in the cheese. Add quinoa and mushroom/sun dried tomato mixture to the squash and stir. Add salt and pepper to taste.
  6. Scoop filling evenly into the butternut squash halves. Sprinkle the top with cheese and return to the oven.  Let bake for 10-15 additional minutes or until cheese has melted and the tops begin to brown.
  7. Enjoy!


You will have to let us know if you try this one out! Do you have any favorite squash recipes you'd like to share? Leave them in the comments!