Follow Our Blog

Our Awesome Followers

Powered by Blogger.
Showing posts with label Tutorial. Show all posts

Monday, June 10, 2013

Wedding DIY: Vintage Escort Cards


Right now I'm relaxing on a beach somewhere in Maui! Jay and I just got married last Saturday and I scheduled some wedding related posts for you this week in honor of our special day :) I hope you enjoy! 

We wanted to do something a little different for our escort cards at the wedding. We got married on an organic farm and we we're really playing up the vintage vibe. The farm also has honey bees (on another property nearby) and they jar and sell their honey. We bought a bunch of jars in four flavors (raw, cocoa, mint and cinnamon) and I wanted to incorporate the escort cards to tie it all together. 


I used some thick brown card stock, a large tag punch, mint bakers twine and the honey jars to create the final look. I used Adobe PhotoShop to create the tags using two different fonts. I made the last names larger so that our guests could easily find their jar.  After I was happy with the font and size, I printed them on the card stock in a darker brown ink color. I then cut the card stock in to smaller pieces so I could use the punch to get the exact shape I wanted. After they were punched out I measured some bakers twine and tied it around the jars. So simple! It didn't take long at all. 


After they were all put together I put the jars in vintage cocoa-cola crates that I found at an antique shop. I think these look great with our vintage theme and I am really happy how they came together! 


Future brides: will you do something unique for your escort cards? What other DIY ideas do you have?


Wednesday, January 9, 2013

How To Get the Perfect Pout


Not sure the best way to get a long-lasting look on your lips? Here’s how:

Start by putting on some lip balm at least five to 10 minutes before you plan to put on your lip liner, gloss and/or lipstick. I used a balm by Yes to Carrots.

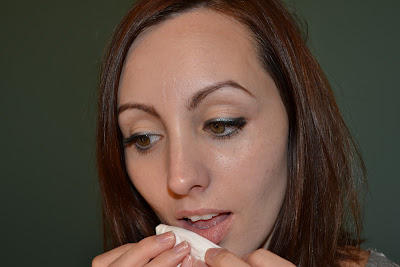
Before you begin to put on your lip products, wipe off most of the lip balm. You want the balm to soften your lips, but not get in the way of your product sticking to your lips.

Start with lip liner to give your product something to stick to.

To line your lips, use short strokes to trace around the border of your lips. I usually start from the center and work outward.


When you’ve finished outlining the border of your lips, fill in your whole lip with the pencil.


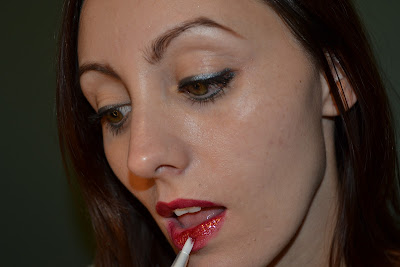
Next, add your lipstick and/or lip gloss. Press your lips together as you go.


Use a cotton bud or bit of toilet paper to clean up any goofs.

All done!


For this look I used a Stila Lip Glaze, but you could always apply a lipstick then gloss over the top. If you apply a lipstick, try out this powder trick I posted about last year to help it last longer.

Enjoy your perfect pout!


Monday, January 7, 2013

How To Fill in Your Brows


If you’ve never filled in your brows, you might not realize what an impact it can have on your overall look. Whether you’ve chosen minimal makeup or are dolling up for a party, filling in your brows helps frame your face and makes your face look finished. 

One of my favorite ways to fill in my brows is with powder. The result is a really soft and natural looking finish. Here’s how to do it:

Start with an angled brush.

Run the brush through your powder and begin with the part of your brow closest to your nose. I usually select a color noticeably lighter than my natural brow color. Using a dark brown color, like the color of my brows, is way too intense on my face.

Brush the hairs upward until you have the inner portion of the eyebrow completely filled in. Use light, even strokes.

Turn the brush and begin coloring outward. Make sure to accentuate the arch of your brow.

If you feel like your brows need a little extra length, feel free to use the brush to extend the shape a bit.

Use a brow gel to hold everything in place. Brush all the hairs upward with the gel wand. Then, brush the hairs to the side. Continue shaping your brows with the gel wand until they are all in shape you desire.

All done! 

What are some of your favorite brow products? Share in the comments!


Wednesday, August 22, 2012

Clean-up Time!


makeup brushes cleaning

If cleaning your makeup brushes isn’t something you regularly do, I recommend you go grab your makeup case, pull out your brushes and get to it immediately. 

Not cleaning your makeup brushes can result in dirt, oil and bacteria being harbored on the tools, and therefore transferring all that gunk back onto your face. What’s more, if you continually use the same brushes without cleaning them, it will muddy any colors you try to apply. 

Not sure how to give your brushes a good scrub? Just follow these steps:

If you’re looking to give your makeup brushes a quick clean, invest in a brush spray like Sephora Collection Daily Brush Cleaner.

SEPHORA COLLECTION - Daily Brush Cleaner

All you need to do is spray the product directly onto the bristles of any brush, then gently rub the bristles onto a tissue or paper towel. Be sure not to press too hard and bend the bristles.

If you’re looking to do a deep cleaning with your brushes, you can do so with baby shampoo or a specially formulated brush cleanser, like MAC Brush Cleanser. 

Baby Shampoo

Brush Cleanser

Run your brush under lukewarm water and thoroughly wet the bristles. Add a small amount of the shampoo to the palm of your hand and swirl the brush around in it until you work up a lather. After about 30 seconds of running the brush along your hand, rinse the brush under the water until the water runs clear.

Make sure you don’t stand the brush upright at any point during this process because droplets of water can leak down and loosen the area where the bristles attach to the handle of the brush. 

Once you’re done washing, gently squeeze the remaining water from the brush. Using your fingers, reshape the brush into the correct shape and lay it flat on a towel to dry. I recommend doing this before you go to bed so that you can leave your brushes out to dry overnight.

If you can, try to deep clean your brushes once a week and spot clean them throughout the week. Your makeup colors will look truer and more crisp, and you'll probably save yourself some breakouts from using dirty brushes. 

Do you have any brush cleaning tips?


Wednesday, August 15, 2012

Hair: Fishtail Braid Tutorial


Fishtail braids are all the rage in this summer heat. They look so much harder to do then they really are - I promise! Follow these simple steps and with some practice you can sport this look too.

1. Brush your hair to one side and make two equal sections of hair.

2. Pull a thin strand of hair from the outside of the back section. Pull it over the top of the back section, and grasp it under the front section. Put simply: the strand of hair has gone over the back section and finishes under the front section.

3. Repeat Step 2 on the other side. Pull a skinny strand of hair from the outside of the front section, pull it over the front section, then weave it under the back section.

4 & 5. Keep alternating sides, weaving over and under, until you reach the bottom of the braid.

6. Secure with a hair tie or elastic.

7. Gently pull small sections of the braid to loosen it up for a more relaxed look.

And you're done! Told you it was easy.

Do you think you'll try this look? What are some other hairstyles you've been wanting to try for the summer?

Friday, July 27, 2012

How-To: Winged Eyeliner


Love the look of winged eyeliner but haven’t quite mastered it? I’ll show you two really easy tricks to help you get the hang of creating this look: the tissue method and the tape method. What?? I know it sounds weird, but using either a piece of tape or a tissue helped me master the winged eyeliner effect.

Here are the steps:

1. Before getting to the tape/tissue part, apply your eyeliner in small short strokes, making sure to thicken the line as you approach the outer corner of your eye. Trying to drag one line across your eyelid often results in unevenness and less product in some areas.

2. Stop when you get to the outer corner of your eye. Your first goal should be to apply the eyeliner as if you weren’t going to wing it out.

3. Once you’re happy with the line you’ve created, choose either the tape or tissue. If you go with the tape, I recommend placing it on the back of your hand and peeling it off first. Do this several times so that it’s not so sticky when you place it near your eye. If you have really sensitive skin or have some kind of reaction from sticking the tape on your hand, please don’t use this method! If you choose the tissue, fold it in half.
 
4. Align the tape or tissue with the bottom rim of your eye (you should try to match the angle), like so: 


5. If you’re using a tissue, you’ll either have to hold it in place while you finish your eyeliner or tape it down. Even if you tape it down, you’ll need to apply light pressure near your eye to make sure the tissue doesn’t come up while you are applying your eyeliner.
 
6. In small short strokes, draw a line from the outer corner of your eye along the tape or tissue. The length is up to you; it all depends on how dramatic you want to make the look.
 
7. Once you have drawn that line, start at the very end of the line and slowly draw back toward the center of your eye in order to connect the wing and the rest of your eyeliner. Fill in any gaps.

You're done!


A few tips:

I think that this look works best with either liquid or gel eyeliner. These types of eyeliners are a bit difficult to wipe away once they dry, so one idea is to lightly trace out the shape of your eyeliner with the same color eye pencil or eyeshadow before putting on the liquid or gel liner.

Don’t be discouraged if you can’t get it perfect right away. Keep a cotton bud soaked in eye makeup remover handy to clean up any mistakes.

Have you tried this method? Do you use guides to apply any of your makeup?